Hubby came home the other day and said that his office was hosting a luncheon on Wednesday. Knowing that hubby is such a "man," I volunteered immediately to help. If I left it up to him, there would be food, probably plates, iffy on forks, but no napkins or decorations.
The luncheon was for his area's JPCA (Justices of the Peace and Constables Association). I knew I had some patriotic decorations, so there started my theme. By the way, none of the decorations cost me even a dime.
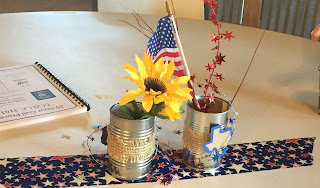
I decided to re-use the cans and burlap I made for my son's Eagle Court of Honor. (Here's the link to that page.) I originally stuck the fleur-de-lis down with hot glue and knowing that my next son is getting close to his Eagle Scout, I didn't want to damage them. I heated up the hot glue with my heat gun so I could remove them without damaging them. Then, I cut out Texas shapes using Sure Cuts A Lot with my Cricut and attached them to the cans.
I went through my fake flower stash and found a sunflower garland that I had once hung as a window valence. I pulled off all the flowers on my other stems and replaced them with sunflowers from the garland.
In my patriotic decorations (and leftover school stuff), I found lots of American flags, a little ribbon, and that wire stuff with metallic stars.
I placed sunflowers and flags with garland in the cans held down with rocks. I took a picture at home of how the tables would look. I planned to use extra blue table cloths but when we got to the location, the tables were round and I only had rectangle table cloths. Oops, no table cloths for this luncheon. I also planned to layer the ribbon, burlap, and wire with the cans. However, after arriving to set up, I discovered that I only had a small bit of ribbon. Add to that, I was originally told 20 people then it doubled! I figured I could decorated 4-5 tables. When we arrived 12 tables were set up. The back row didn't get decorations but the 8 tables in the front did.
How? I improvised. Some tables got burlap, some ribbon, some 2 cans, some 3, and one table only got one can. All in all, it turned out really cute. I received lots of compliments. The facility was very rustic looking and the decorations matched perfectly; almost like I had planned it. Not too shabby for 2 days notice and absolutely no money!


Comments
Post a Comment